Resources
Step 1 - Preparing the Picture
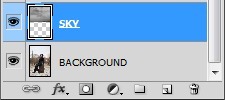
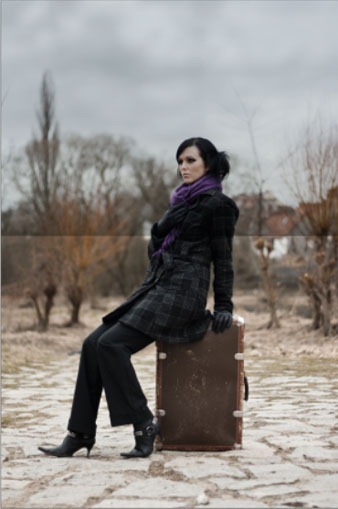
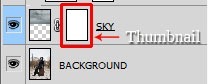
Open the photo of a girl in Photoshop. Right click on the Background and select option Layer From Background. Then open photo of sky and drag it into previous picture. Place it on the top and name it SKY. Below you can see how your layers should look liker.
Step 2 - Blurring the Sky
Right now the sky is not blended with the rest of the picture. You'll fix it in this and following steps. As you may notice picture of the sky is sharper than the background. It's because it was taken with different (higher) f-number setting than the rest of the image. If you start blending sky now you won't get realistic result because of that. To fix it you need to blur the sky a little. Make sure that the SKY layer is active (just click on it). Go to Filter > Blur > Gaussian Blur, set the value Radius on about 3,5 pixels and press OK.

Step 3 - Blending the Sky
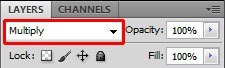
Before you'll start to adjusting contrast and colors of the sky let's focus on blending. Click on the layer SKY and change its Blending Mode on Multiply. You can find this option in the bottom part of the palette Layers (same as your layers). If you don't see it go to Window > Layers or simply press F7 on your keyboard.
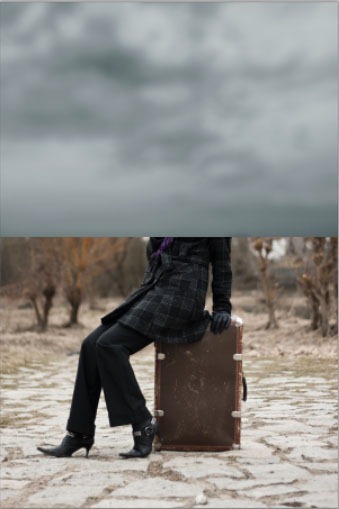
Step 4 - Soft Transition
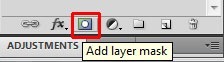
As you can see on the photo above there is a harsh line between SKY and the rest of the image. To fix it add new layer mask to sky. You can find the button Add layer mask on the bottom part of the palette Layers.
If you're not familiar with how you can work with layer masks let me explain it to you. It's similar to what can the Eraser Tool (E) do - you can hide some parts with it. But in compare to the Eraser Tool (E) you can let these parts reappear whenever you want. If you want to have some part hidden you simply paint with black on layer mask, if you want to see it again you paint white on that area. You can't do this with the Eraser Tool (E), you can go back few steps (depends on your History settings) but you always loose also the progress you did so far.
But back to the tutorial...
Grab the Brush Tool (B), pick black color and paint over the harsh line of the sky to make nice, soft transition. On the picture below you can get inspiration what to achieve.
Step 5 - Channels
Women's face is still darker because of the Multiply mode and if you look carefully you'll see that upper part of trees is bit darker because of that too. You need to create mask of which sky should be hidden.. To do that you'll use Channels.
First make the layer SKY invisible. To do that click on the eye icon left to the Layer thumbnail.

If you don't see this palette go to Window > Channels and it will appear. On the palette you can see four different lines - RGB, Red, Green and Blue. If you let visible only one of the Channels you'll see only values from that Channel.
Let's make visible the one where is the biggest contrast between sky and trees. In this case the biggest contrast is on the Blue Channel.
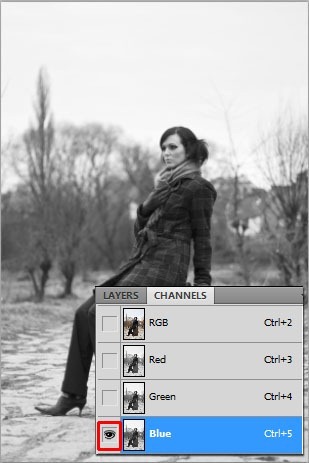
Right click on that Channel and select the option Duplicate Channel... . Make the original Blue Channel invisible.
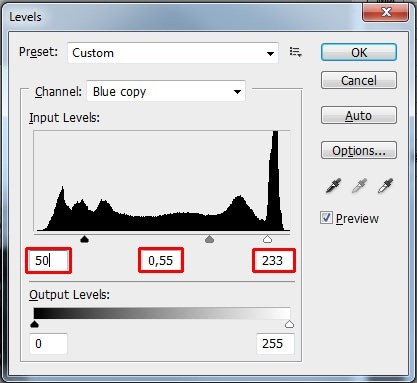
Let's adjust the Blue Channel copy to create good mask from it. Click on that channel and go to Image > Adjustments > Levels or press Ctrl + L on your keyboard. Set the Input Levels on 50; 0,55; 233 and press OK.
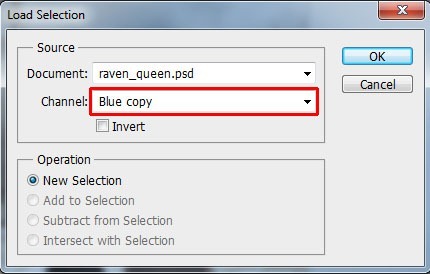
Make visible rest of the channels again and the one you've worked on invisible. Also make visible SKY layer on Layers palette.
Click on the layer SKY and then go to Select > Load Selection and as Channel choose Blue Copy. Press OK.
Mask based on the Blue copy Channel appears. Go to Select > Inverse or press Ctrl + Shift + I on your keyboard to invert it.
Click on the layer mask of the SKY, grab the Brush Tool (B) and pick black color. Now paint over women's face and upper parts of trees. After you're done press Ctrl + D to deselect it.
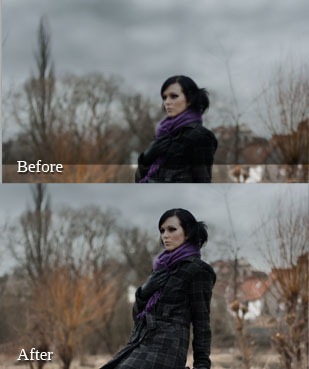
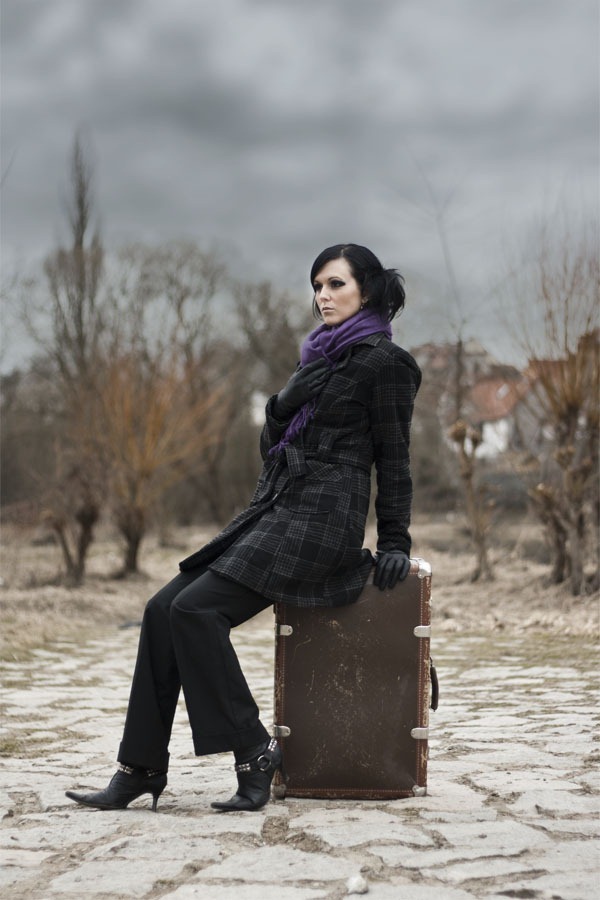
On the following picture you can see how your picture should look like so far.
Tidak ada komentar:
Posting Komentar